Dark wood flooring in bathrooms represents a bold departure from the traditional light, moisture-resistant tile aesthetic. When executed thoughtfully, these rich hardwood surfaces transform a utilitarian space into a sanctuary of warmth and sophistication. Homeowners are increasingly drawn to this choice because it creates visual continuity throughout the home, establishes a spa-like atmosphere, and delivers uncompromising elegance that standard bathroom materials simply cannot match. The deeper tones ground a space, making even modest bathrooms feel more substantial and intentional.
Quick Answer: Dark wood floors in bathrooms are specially treated hardwood surfaces designed to withstand moisture and humidity while delivering the timeless appeal of wood grain and rich color. Their primary benefits include creating a cohesive design flow with the rest of your home, establishing a luxurious ambiance, and adding significant property value—provided they're installed with proper moisture barriers and sealed with high-quality protective finishes.
The decision to install dark hardwood floors in bathrooms goes beyond aesthetics. It requires understanding the technical realities of wood in wet environments, selecting the right species and finishes, mastering installation techniques that protect against water damage, and styling the space so the floors become a design anchor rather than a maintenance liability. This guide walks you through every phase of the process—from evaluating whether dark wood is right for your bathroom, through material selection and professional installation, to styling strategies that maximize impact while preserving the integrity of your floors. Whether you're working with a remodeling partner like WAREMODEL to reimagine your entire bathroom or simply upgrading flooring in an existing space, understanding how to properly implement and maintain dark wood floors ensures you'll enjoy their beauty for years to come.
Table of Contents
- Why Choose Dark Wood Flooring for Your Bathroom Renovation
- Selecting the Right Dark Wood Species and Finish
- Installation Steps for Dark Wood Bathroom Floors
- Prerequisites and Professional Assessment
- Step-by-Step Installation Process
- When to Call Professionals
- Design Strategies to Complement Dark Wood Bathroom Floors
- Maintenance and Long-Term Care for Dark Wood Bathroom Floors
- Cost Considerations and Budget Planning for Dark Wood Bathroom Flooring
- Initial Material and Installation Expenses
- Return on Investment and Long-Term Value
- Comparative Analysis: Dark Wood vs. Alternatives
- Maintenance and Preventative Budgeting
- Common Questions About Dark Wood Bathroom Floors
- Creating Your Dream Bathroom with Dark Wood Floors
Why Choose Dark Wood Flooring for Your Bathroom Renovation
Dark wood flooring transforms a bathroom from purely functional to genuinely luxurious—but the decision requires understanding both its aesthetic power and practical realities. The appeal is immediate: deep tones create visual warmth, establish sophistication, and make even modest bathrooms feel more substantial. Yet bathrooms present moisture challenges that light wood or other materials might sidestep more easily. The key is recognizing that dark hardwood floors in bathrooms work beautifully when installed and maintained with precision, and understanding why this choice has become increasingly popular in modern bathroom design.
The visual impact of dark wood cannot be overstated. Rich chocolate, espresso, or deep walnut tones anchor a space and create a sense of grounded elegance that lighter materials struggle to achieve. When paired with crisp white subway tile, marble accents, or light vanity cabinetry, dark flooring becomes a dramatic design anchor that actually makes the space feel larger through contrast. This interplay between dark and light is not merely aesthetic—it's a design principle that creates visual depth and prevents the bathroom from feeling cramped. The engineered wood product segment, which dominates modern installations, has expanded dramatically; these engineered options offer superior moisture resistance compared to solid hardwood while maintaining authentic wood appearance.
Durability is another compelling reason. Properly sealed dark wood resists staining better than light finishes, meaning water spots, soap residue, and mineral deposits are less visible. The protective topcoat—typically polyurethane or conversion varnish rated for wet areas—creates a barrier that, when maintained, can last 10-15 years or longer. Moisture barriers installed beneath the flooring prevent water from seeping into the substrate, addressing the primary concern that discourages many homeowners from choosing wood in bathrooms at all.
Consider partnering with a remodeling specialist like WAREMODEL, which understands how to integrate dark wood flooring as part of a cohesive bathroom renovation that balances aesthetics with moisture management. Proper ventilation, strategic placement (avoiding direct water exposure in shower zones), and sealed grout lines all contribute to longevity. This is not a material you install and forget—it demands respect and maintenance—but the payoff is a bathroom that feels like a personal retreat rather than a utilitarian space.
Selecting the Right Dark Wood Species and Finish
The wood species you choose fundamentally shapes both the aesthetic and functional performance of your bathroom flooring. Not all dark woods behave equally in moisture-heavy environments, and the finish you apply determines how well your investment resists water damage and daily wear.
Understanding Your Wood Species Options
Walnut stands as one of the most popular choices for dark bathroom flooring. Its naturally rich, chocolate-brown tone requires minimal staining, and the wood's density provides inherent stability in fluctuating humidity. Wenge, an African hardwood with nearly black coloring, offers dramatic visual impact but demands more vigilant sealing due to its slightly more porous nature. Dark oak, when stained deeply, delivers warmth and grain visibility that many homeowners prefer over uniform solid colors. However, solid hardwood species—while beautiful—absorb moisture more readily than engineered alternatives.
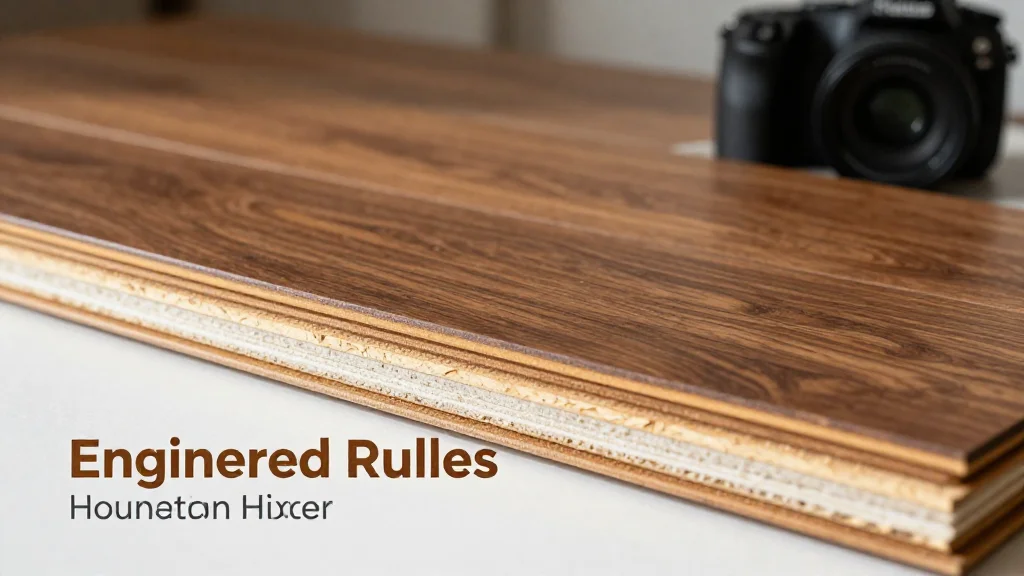
Engineered dark hardwood represents the smarter choice for bathrooms. These products layer a thin veneer of authentic dark wood atop a plywood or high-density fiberboard core, dramatically improving moisture resistance. According to HomeGuide's 2026 hardwood flooring cost analysis, engineered hardwood typically ranges from $9 to $20 per square foot installed, while offering superior stability compared to solid hardwood. Modern waterproof engineered options with advanced locking systems—such as those featuring Valinge 5G® Dry™ technology—provide 24-hour surface spill protection and eliminate concerns about swelling or delamination that plague traditional wood in wet spaces.
Finish Selection: Matte vs. Glossy Performance
Your finish choice affects both safety and maintenance. Matte finishes hide water spots and soap residue beautifully, reducing the visual burden of keeping the floor spotless. They also provide superior slip resistance—critical in a bathroom where wet feet are inevitable. Glossy finishes reflect light and create an impression of spaciousness, but they show every water droplet and require more frequent cleaning to maintain their shine. In practice, most bathroom flooring specialists recommend satin or matte polyurethane finishes rated specifically for wet areas, as these strike the balance between durability and practical maintenance.
The protective topcoat itself matters enormously. Conversion varnish and commercial-grade polyurethane both offer 10-15 year lifespans when properly maintained. Ensure any finish you select carries explicit water-resistance ratings and is approved for bathroom use—generic hardwood finishes will fail in this environment.
When planning your bathroom renovation, consider consulting with specialists like WAREMODEL, who understand how to integrate dark wood flooring within a moisture-management strategy that includes proper ventilation, substrate barriers, and strategic placement away from direct shower spray. The right species paired with the right finish transforms dark wood from a risky choice into a durable, luxurious statement that elevates your entire bathroom design.
Installation Steps for Dark Wood Bathroom Floors
Installing dark wood flooring in a bathroom demands precision and respect for moisture dynamics that differ fundamentally from living room or bedroom installations. The process requires careful preparation, professional-grade moisture barriers, and meticulous attention to substrate conditions—shortcuts here will compromise both the aesthetic appeal and longevity of your investment.
Prerequisites and Professional Assessment
Before any installation begins, your bathroom must undergo a moisture assessment. This involves testing subfloor moisture levels with a moisture meter; readings should not exceed 12% for wood installation. If your bathroom has experienced previous water damage, active leaks, or poor ventilation, addressing these issues takes priority over flooring work. You'll also need to evaluate whether your existing subfloor—typically concrete or plywood—is stable, level (within 1/8 inch per 10 feet), and properly sloped toward drains where applicable.
Gather professional-grade materials: a premium moisture barrier (6-mil polyethylene or specialized underlayment rated for bathrooms), quality adhesive or fasteners designed for wet environments, your chosen dark wood planks acclimated to your bathroom's humidity for 48-72 hours beforehand, and finishing products rated for bathroom use. The installation itself typically requires 2-4 days depending on bathroom size, though curing time adds another week before full use.
Step-by-Step Installation Process
Prepare and seal the subfloor. Begin by thoroughly cleaning the subfloor of dust, debris, and existing adhesive. If working over concrete, apply a concrete sealer first—this critical step prevents moisture from wicking upward into your wood planks. For plywood subfloors, inspect for soft spots or water damage and replace compromised sections. A professional installer will ensure the surface is completely dry before proceeding.
Install the moisture barrier. Lay down your moisture barrier material, overlapping seams by at least 6 inches and extending it partially up the walls. This barrier is your primary defense against bathroom moisture and should be treated as non-negotiable. Specialists like those at WAREMODEL emphasize that this step often determines whether dark wood flooring remains pristine or develops cupping and discoloration within months.

Plan your layout strategically. Dry-lay your planks to establish the most visually balanced arrangement, typically running boards perpendicular to the bathroom entry or parallel to the longest wall. Account for expansion space—leave a minimum 1/2-inch gap around all perimeter walls and obstacles. Mark your starting line clearly; most installers begin in the center of the room and work outward, or from the most visible wall working backward.
Install planks with precision. Using moisture-resistant adhesive or stainless-steel fasteners (never standard nails), secure each plank firmly to the subfloor. Stagger end joints across rows to avoid long seams that can telegraph movement. Press each plank tightly against its neighbor using a tapping block to avoid marring the surface. Maintain consistent spacing and check frequently with a level—dark wood's dramatic grain will amplify any unevenness in the floor plane.
Sand and finish immediately after installation. Once all planks are secured and adhesive has cured (typically 24 hours), the floor must be sanded to create a uniform surface. This step is essential for dark wood, as it removes minor installation variations and prepares the surface for sealant. Sand progressively from coarse (60-grit) to fine (120-grit) grits. Apply your bathroom-rated finish—typically commercial-grade polyurethane in a satin or matte sheen—in at least three coats, sanding lightly between coats. Allow full curing (7-10 days) before exposing the floor to moisture.
When to Call Professionals
Dark wood bathroom flooring installation is genuinely one scenario where professional installation is not merely recommended but essential. Moisture management, substrate preparation, and finishing require expertise that protects your investment. DIY installation risks moisture failure, improper sealing, and finishing defects that become permanent liabilities in a wet environment. If your bathroom layout includes challenges like radiant heating systems, complex plumbing configurations, or existing moisture issues, professional assessment becomes even more critical.
Design Strategies to Complement Dark Wood Bathroom Floors
Dark wood bathroom flooring commands visual weight and sophistication, which means the surrounding design elements must work in concert to create balance rather than visual chaos. The key is recognizing that your dark floors function as an anchor—a design foundation that allows you to build outward strategically. When styled thoughtfully, dark wood can actually expand perceived space and create an atmosphere of refined calm rather than heaviness.
Color Palettes That Breathe
Pairing dark wood with the right wall colors determines whether your bathroom feels intimate or claustrophobic. Soft, neutral walls—warm whites, pale grays, or muted warm taupes—create the essential breathing room your design needs. These backgrounds allow the floor to remain the focal point without overwhelming the space. If you prefer color, consider warm creams or very pale sage greens that echo natural elements without competing with the wood's richness. Avoid cool grays or stark whites, which can create harsh contrast and make the space feel disjointed. The wall color should recede visually, allowing your eye to travel across the floor as the primary design statement.
Fixture Selection and Metals
Your bathroom fixtures should echo the warmth embedded in dark wood flooring. Brushed bronze, oil-rubbed bronze, and warm brass fixtures complement the wood's undertones far more effectively than polished chrome, which creates jarring visual discord. Matte black fixtures work beautifully if they carry warmth in their finish—avoid cold, industrial black that feels disconnected. The vanity itself should either be a lighter wood (creating intentional contrast) or a soft neutral cabinetry that doesn't compete with floor color. This creates visual hierarchy: dark floors ground the space, while upper elements remain lighter and more open.
Lighting for Depth
Lighting transforms how dark wood reads in a bathroom environment. Layered lighting—combining overhead fixtures with vanity-level sconces and potentially recessed lighting—prevents shadows that make dark floors appear murky. Warm-toned LED bulbs (2700K-3000K) harmonize with wood undertones, while cooler temperatures can make the same floor appear gray and uninviting. Consider adding a light source that specifically illuminates the floor plane itself, such as recessed lighting positioned to graze the wood surface. This creates visual interest and prevents the floor from disappearing into shadow, a common mistake in dark wood bathroom design.
Complementary Materials and Textures
Introduce lighter materials strategically to prevent visual heaviness. Natural stone—marble, limestone, or travertine—works exceptionally well as shower wall surrounds or accent features. These materials are practical for moisture exposure and create visual relief. Matte finishes are ideal here; according to Elmwood Reclaimed Timber's 2026 hardwood flooring trends, matte finishes on wood disguise minor scratches and daily wear better than high-gloss options, making them perfect for busy households. Incorporate natural fiber elements like linen shower curtains, woven storage baskets, or a wooden stool in lighter tones to add texture without lightening the floor visually. These textural elements create sophistication while maintaining the cohesive aesthetic.
Expanding Space Through Design Choices
Dark wood bathroom floors need visual expansion strategies. Mirrors positioned opposite or above the vanity multiply light and create perceived depth—this is non-negotiable in smaller bathrooms. Vertical lines in wall treatments or tile work draw the eye upward, making ceilings feel higher. If your bathroom layout allows, keeping the shower area visually open (rather than enclosed in dark tile) prevents the space from feeling segmented and heavy. Professional bathroom remodeling concepts, like those from WAREMODEL, focus on creating more functional space through thoughtful layout and material choices—ensuring that dark floors enhance rather than diminish your bathroom's sense of openness.
The design strategy for dark wood bathroom flooring ultimately hinges on restraint and intentionality. Every element should serve the floor rather than compete with it, creating a cohesive environment where luxury emerges from simplicity and balance.
Maintenance and Long-Term Care for Dark Wood Bathroom Floors
Dark wood bathroom floors demand a maintenance philosophy rooted in prevention rather than repair. Unlike tile or vinyl, which shrug off moisture with indifference, wood requires intentional care to thrive in a bathroom's humid environment. The payoff, however, justifies the effort—hardwood floors can last 75-100 years with proper care, according to Lifetime Flooring Jacksonville, significantly outlasting vinyl alternatives. This longevity transforms dark wood from an aesthetic choice into a genuine investment in your home's future.
Daily and Weekly Care Routines
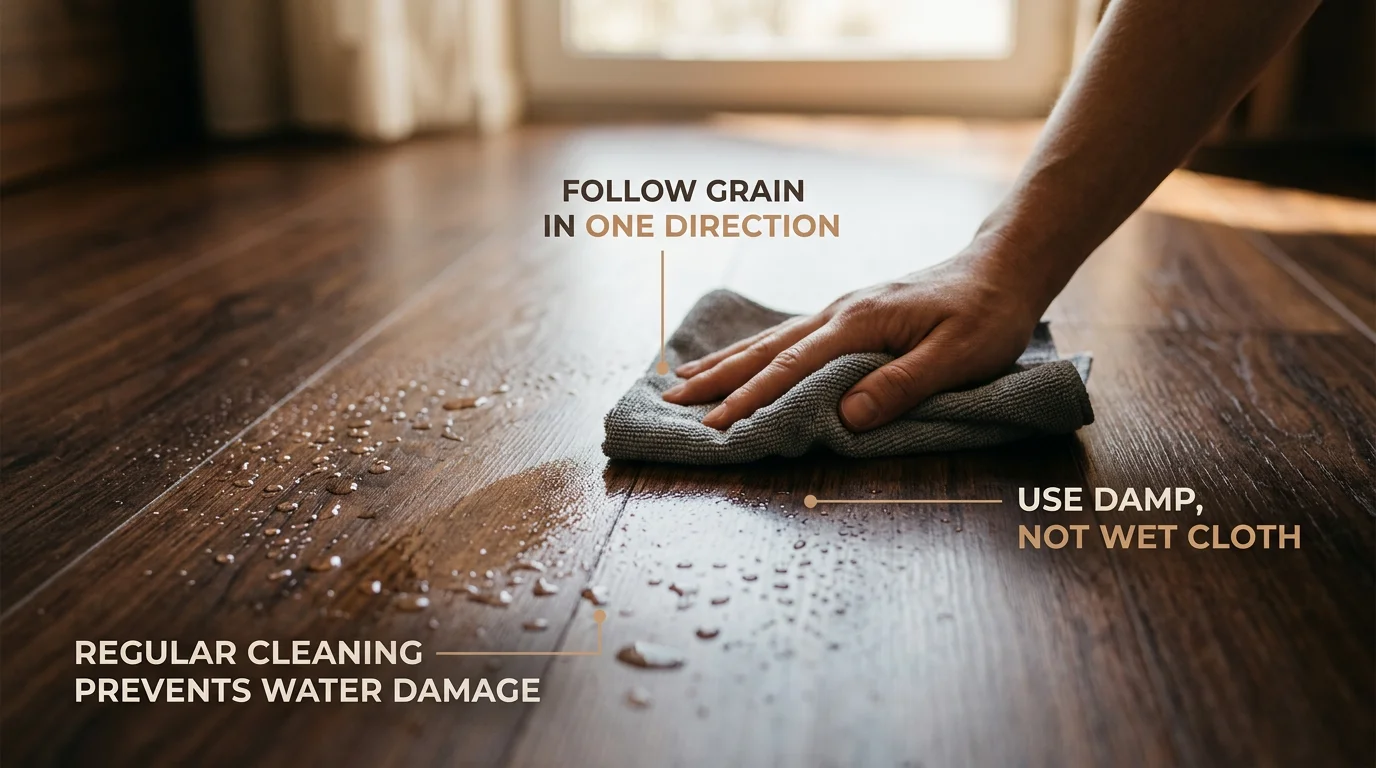
The foundation of dark wood floor maintenance begins with moisture control. Wipe spills immediately—water sitting on wood is your floor's worst enemy. Use a barely damp microfiber cloth for regular cleaning; excess water should never pool or seep into seams. A soft-bristled broom or vacuum with a hardwood-specific setting removes dust and debris daily without scratching the finish. Weekly, apply a hardwood-safe cleaner formulated for sealed wood floors, spraying it lightly onto a cloth rather than directly onto the floor. This prevents oversaturation while ensuring an even clean. Never use vinegar, ammonia, or steam cleaners on dark wood—these compromise the protective finish and can cause water damage that manifests as dark stains or warping weeks later.
Moisture Management as Prevention
Bathrooms are inherently humid, but strategic ventilation mitigates risk considerably. Run your exhaust fan during and for at least 20 minutes after showers to extract moisture-laden air. Consider installing a humidity meter to monitor levels; keeping them below 60% prevents the wood from swelling or contracting excessively. Ensure proper grading around your bathroom so water drains away from the foundation, and inspect caulking around the tub or shower quarterly—failing caulk allows water to seep underneath the flooring, where it causes silent damage before symptoms appear.
Addressing Water Rings and Stains
Water rings—those telltale marks from damp towels or condensation—require swift action. Blot the area dry immediately, then apply a specialized wood restorer or mineral oil to the spot, working it in with the grain. For stubborn rings that have set, light sanding with fine-grit sandpaper (220-grit or higher) followed by restaining may be necessary. Mold prevention is equally critical; if you notice dark spots or musty odors, the floor has likely absorbed moisture beneath the finish. Address this by improving ventilation immediately and consulting a professional about potential structural moisture issues.
Refinishing and Long-Term Restoration
Engineered hardwood flooring typically lasts 20 to 30 years with proper maintenance, and high-quality versions can exceed 40 years, according to Nielsen Bros Flooring. Even solid dark wood eventually shows wear. Plan for refinishing every 7–10 years, depending on foot traffic and maintenance diligence. Professional refinishing restores the protective polyurethane or oil finish, reviving the wood's depth and color while sealing out moisture anew. This is not a DIY project—improper sanding or finishing application creates uneven surfaces and inadequate protection.
Preventative Measures
Use bath mats with non-slip backing to absorb moisture and prevent water from spreading across the floor. Place absorbent rugs in front of the vanity and toilet to capture splashes. Avoid dragging heavy items across the floor; use furniture sliders when repositioning fixtures or storage pieces. In high-traffic bathrooms, consider area rugs in strategic zones to distribute wear and protect the finish from degradation. Professional remodeling concepts, like those from WAREMODEL, emphasize preventative design—proper slope in shower areas, waterproofing membranes beneath flooring, and strategic material placement all reduce maintenance burden and extend floor lifespan.
The reality is straightforward: dark wood bathroom floors reward diligence with enduring beauty. Treat them as living material requiring respect for their nature, and they will serve your home with distinction for decades.
Cost Considerations and Budget Planning for Dark Wood Bathroom Flooring
Dark wood bathroom flooring represents a significant investment, and understanding the full financial picture—from material acquisition through long-term maintenance—ensures your decision aligns with both aesthetic ambitions and budget reality. The cost equation extends far beyond the wood itself, encompassing installation labor, waterproofing infrastructure, and the preventative measures that protect your investment over time.
Initial Material and Installation Expenses
According to research from HomeWyse, bathroom flooring installation typically ranges from $11.01 to $20.00 per square foot in 2026. For a standard 40-square-foot bathroom, this translates to $440–$800 in labor alone. Material costs for dark wood species vary considerably: engineered dark hardwoods (oak, walnut, hickory) range from $3–$8 per square foot, while premium species like Brazilian walnut or teak demand $8–$15 per square foot. A complete bathroom remodeling project incorporating dark wood flooring typically falls between $700 and $4,200, depending on material selection, space dimensions, and whether you pursue professional installation or attempt a hybrid approach.
Waterproofing adds essential expense that cannot be compromised. Moisture barriers, underlayment systems, and sealant applications typically cost $2–$4 per square foot—a non-negotiable investment that prevents wood rot and structural damage. Skipping or cutting corners on waterproofing transforms dark wood flooring from an asset into a liability.
Return on Investment and Long-Term Value
The financial case for dark wood bathroom flooring strengthens considerably when viewed through a resale lens. Hardwood flooring delivers 70–80% return on investment and increases property value by 3–5%, with refinishing existing hardwood floors yielding up to 147% cost recovery and new installations achieving up to 118% cost recovery according to the National Association of Realtors. Mid-range bathroom remodels typically recover 60–70% of their cost in resale value, with flooring being a critical component of this recovery rate. Dark wood, specifically, signals luxury and intentional design—qualities that resonate with discerning buyers.
| Cost Component | Low Estimate | High Estimate | Notes |
|---|---|---|---|
| Dark wood material (per sq ft) | $3 | $15 | Engineered vs. premium species |
| Installation labor (per sq ft) | $11 | $20 | Professional installation required |
| Waterproofing system | $2 | $4 | Per square foot; essential |
| Finish/sealing | $1.50 | $3 | Initial protective coat application |
| Total (40 sq ft bathroom) | $1,040 | $1,760 | Baseline remodel scenario |
Comparative Analysis: Dark Wood vs. Alternatives
Ceramic tile and porcelain remain the bathroom flooring default, costing $1–$3 per square foot in material with similar labor rates. While tile offers superior moisture resistance and lower maintenance burden, it lacks dark wood's warmth and sophistication. Luxury vinyl planks (LVP) cost $2–$5 per square foot and mimic wood aesthetics convincingly, but they do not deliver the same resale value or tactile authenticity. Stone flooring (marble, slate) ranges $5–$15 per square foot and rivals dark wood in luxury positioning, yet requires similar waterproofing rigor and carries comparable maintenance costs.
Dark wood's value proposition emerges when you factor durability, aesthetic impact, and long-term ownership satisfaction. Unlike LVP, which cannot be refinished, dark wood floors can be sanded and resealed multiple times, extending lifespan by decades and amortizing costs across generations.
Maintenance and Preventative Budgeting
Plan for annual maintenance costs of $150–$300, including professional cleaning, minor repairs, and finish touch-ups. Major refinishing—undertaken every 7–10 years depending on traffic—costs $1.50–$4 per square foot and should be factored into long-term planning. Preventative investments in bath mats, rugs, and moisture control systems (humidity monitors, ventilation upgrades) typically run $200–$500 initially but dramatically reduce emergency repair expenses.
Professional remodeling concepts, like those from WAREMODEL, emphasize preventative design from the outset—proper shower slope, integrated waterproofing membranes, and strategic ventilation reduce your maintenance burden substantially and protect your flooring investment from the moment installation concludes. This upfront investment in design and infrastructure pays dividends through reduced future costs and extended floor lifespan.
Common Questions About Dark Wood Bathroom Floors
Will dark wood flooring really hold up in a bathroom environment? This is the question that stops most homeowners cold, and it deserves a straightforward answer: yes, when properly installed and maintained with realistic expectations. Dark wood bathroom flooring performs comparably to light wood in moisture resistance—the color itself doesn't determine durability. What matters is the wood species (engineered hardwood or solid wood with proper moisture barriers), the finish quality, and your commitment to ventilation and spill management. Think of it less as "wood that will survive a bathroom" and more as "a material that requires respect for moisture dynamics."
How much maintenance are we really talking about here? Daily maintenance is minimal: sweep or vacuum regularly, wipe spills immediately with a dry cloth, and use bath mats to contain water. Weekly or bi-weekly, a slightly damp microfiber mop works well. The real commitment emerges annually—professional cleaning, minor touch-ups to the sealant, and humidity monitoring. Major refinishing happens every 7–10 years depending on foot traffic. If you're comfortable with this rhythm, the investment pays off; if you expect zero-maintenance flooring, ceramic tile remains the safer choice.
Can I install underfloor heating beneath dark wood bathroom floors? Absolutely, but with caveats. Engineered hardwood accommodates radiant heating better than solid wood because engineered planks resist cupping and warping from temperature fluctuations. If you're committed to underfloor heating, specify this requirement during installation and ensure your contractor uses moisture barriers that work with heating systems. The combination creates a luxurious, warm bathroom experience—just budget for professional installation to prevent complications.
Will dark wood flooring work with my existing bathroom design, or do I need to redesign everything? Dark wood flooring is remarkably versatile. It pairs beautifully with contemporary, transitional, farmhouse, and even minimalist aesthetics. The key is balancing its visual weight through lighting, wall color, and fixture finishes. Bright, well-lit bathrooms with white or soft-neutral walls prevent dark wood from feeling cave-like. Modern remodeling concepts from WAREMODEL often integrate dark wood strategically—perhaps in the main vanity area while using complementary tile in the shower—creating visual interest without overwhelming the space.
What's the real cost difference between dark wood and alternatives like luxury vinyl plank? Dark wood costs more upfront ($8–$15 per square foot installed versus $3–$8 for LVP) but offers longevity that LVP cannot match. Unlike vinyl, wood can be refinished multiple times, effectively extending its lifespan by decades and distributing costs across generations of ownership. When calculating true cost-per-year, dark wood becomes increasingly competitive over 20+ years, particularly if you plan to remain in your home long-term.
Creating Your Dream Bathroom with Dark Wood Floors
Dark wood bathroom flooring represents far more than a passing design trend—it embodies a fundamental shift in how homeowners approach bathroom aesthetics and functionality. When executed with precision and maintained with intention, dark wood transforms a utilitarian space into a sanctuary that balances warmth, elegance, and perceived spaciousness in ways that conventional tile or vinyl simply cannot replicate.
The journey from concept to completion requires understanding three interconnected elements: proper material selection, meticulous installation with waterproofing at every layer, and a realistic maintenance commitment that prevents problems rather than chasing repairs. Dark wood species like walnut, wenge, or engineered dark oak provide the visual drama and sophistication that homeowners crave, but only when paired with polyurethane finishes or pre-finished engineered boards rated specifically for high-moisture environments. The waterproofing layer beneath—whether a moisture barrier, epoxy primer, or specialized subfloor treatment—becomes the invisible guardian that separates a decades-long investment from a costly mistake.
Installation precision cannot be overstated. Unlike living rooms where minor gaps or uneven planks blend into the overall aesthetic, bathrooms demand tight tolerances, proper ventilation channels, and substrate preparation that accounts for seasonal humidity fluctuations. This is where partnering with remodeling professionals who understand both the technical requirements and design vision becomes invaluable. WAREMODEL and similar innovative remodeling concepts excel at integrating dark wood strategically—perhaps anchoring the vanity area while using complementary materials in wet zones—creating visual interest without compromising moisture resistance or long-term durability.
Maintenance philosophy must shift from reactive repair to proactive prevention. Consistent humidity control through exhaust fans, quick water removal after showers, and periodic resealing of the polyurethane finish ensure dark wood remains beautiful and structurally sound. The wood's natural patina deepens gracefully over years, telling the story of your home rather than showing signs of neglect.
If you're contemplating dark wood bathroom design for your own project, consult with experienced remodeling professionals who can assess your specific moisture profile, ventilation capacity, and long-term maintenance expectations. The decision to install dark hardwood flooring in a bathroom is bold—but with expert guidance and disciplined care, it rewards you with a space that feels both timeless and genuinely yours.